Earlier, we learned about SNMPv3 configuration on Cisco IOS devices. Today we will learn, how to configure SNMP v3 in Cisco Nexus Devices. So, let’s get started.
SNMPv3 support three (3) modes. These are-
- noAuthNoPriv
- authNoPriv
- authPriv
If you are decided to configure snmp v3, then, there is no point to configure noAuthNoPriv or authNoPriv. It’s because, they are not fully secure. That means, obviously you should go for authPriv, which provide better security.
So, in this example we will configure SNMP v3 authPriv mode for nexus switches. Let’s get started.
We will be using below information to create the SNMPv3 configuration on NX-OS.
| Username | Authentication Method | Authentication Password | Encryption Method | Encryption Password |
| SNMPuser | sha | gjdVSse7hm | aes-128 | LpVtJvQ9yk |
How to configure SNMPv3 in Cisco Nexus Devices
To configure the snmp v3, we only need to run below command.
snmp-server user SNMPuser auth sha gjdVSse7hm priv aes-128 LpVtJvQ9yk
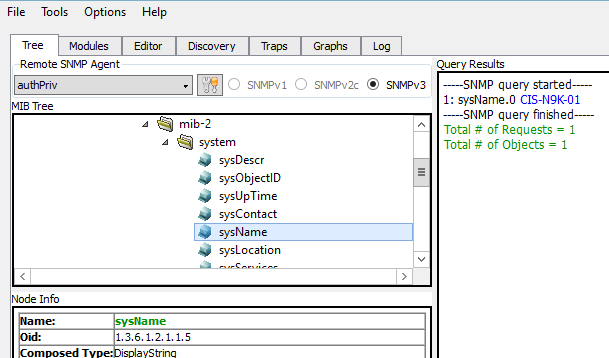
Now, you can check your snmp server to pool the information. In my case, i am using open source snmp server named SnmpB to test the snmp v3 configuration.
You can see, i am pooling device hostname using get command in SNMP. That means, my configuration is working.

How to configure SNMP v3 Trap in Cisco Nexus Devices
You need to run below command for SNMP trap.
snmp-server host 192.168.0.100 version 3 priv SNMPuser
snmp-server enable traps
snmp-server globalEnforcePriv
Explanation:
192.168.0.100 = SNMP trap receiver IP address
SNMPuser = Users for SNMP v3 trap receiver
snmp-server enable traps = Enabled traps for all alarm
snmp-server globalEnforcePriv = Encryption SNMP messages for all users
So, this is how we configure SNMP v3 in Cisco Nexus Devices. Let me know if you have any questions.

