In this lesson, we will learn how to configure Palo Alto Networks Firewall Management. Hope, you already know, we have two methods to configure Palo Alto firewall, GUI and CLI. We will use GUI to do Palo Alto Networks Firewall Management Configuration. Here we will configure-
- Management IP and gateway
- We will allow management services like SNMP
- We will restics management access
- DNS and NTP configuration
- Hostname, Timezone configuration

By default, Palo Alto firewall uses Management port to retrieve all the licenses and, update application signature and threats. Because of that, we need internet access on MGT port with proper DNS settings.
By default, Palo Alto has following –
| Management IP | Username | Password |
| 192.168.1.1/24 | admin | admin |
Management IP, Gateway, Services and Restriction
First of all, you need to connect your LAPTOP on MGT interface. Use any IP between 192.168.1.2 – 192.168.1.254. However, if you want to change default MGT IP, then we have to use console cable and change the MGT IP address. Default credential is admin/admin as shown above.
To change/set management IP, we need to do the following.
admin@PA-VM# set deviceconfig system ip-address 192.168.43.100 netmask 255.255.255.0
Another important thing, always make sure to put commit to apply configuration changes.
[edit]
admin@PA-VM# commit

...75%99%.....100%
Configuration committed successfully

[edit]
admin@PA-VM#
Currently device is using self sign certificate. Due to that, it will show a warning in our browser. We need to move forward by allowing it and use default credential to login to the web interface.
Here, we are using default username and password, hence it will show following warning message.
Warning: Your device is still configured with the default admin account credentials. Please change your password prior to deployment.
We need to change the password later. Press OK and continue.
In the dashboard, you will find lot’s of information; like, general information, resource information and different logs. To configure the gateway and dns for the Management interface, you need to go Device >> Setup >> Management >> Management Interface Settings.
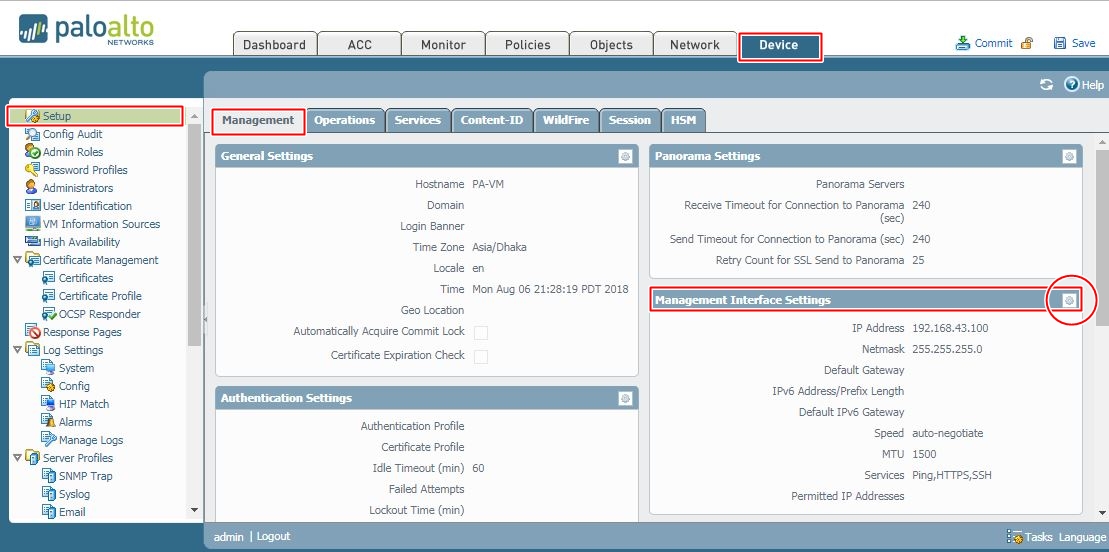
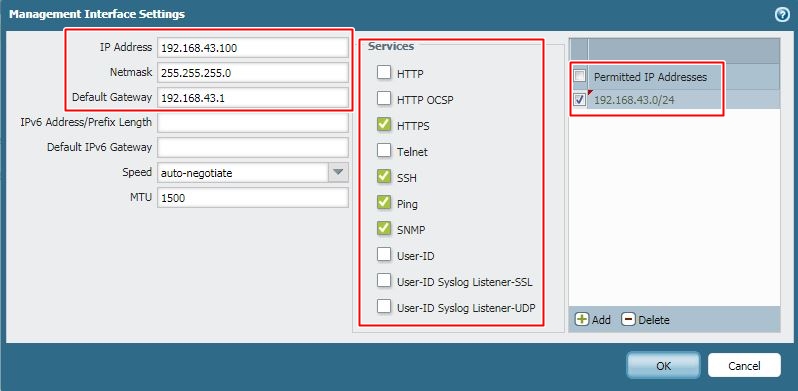
We are already using IPv4 address (192.168.43.100) for the device management. So, will put gateway address 192.168.43.1 which is management gateway for all of our devices. By default, SSH, PING and HTTPS is allowed; however additionally we will allow SNMP. In the third section, we have limited device management access from only management IP block (192.168.43.0/24). You need to do this according your network topology.
DNS and NTP
Now, lets add the DNS. To add it, we need to go Device >> Setup >> Services and press gear button.
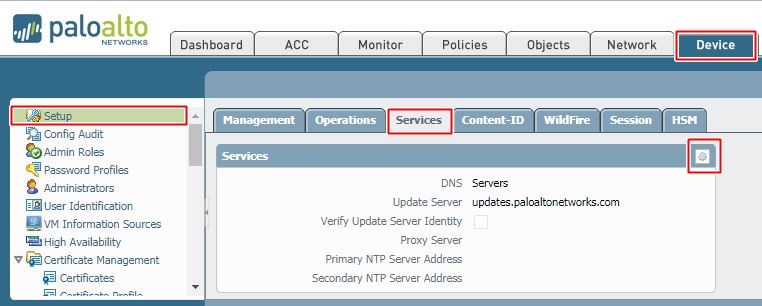
We are using Google free dns 8.8.8.8 and 8.8.4.4 here. After changing DNS, we will change our NTP. We will use free Google NTP servers. It’s always best if we can use our own DNS and NTP servers (if have any).


Hostname, Timezone and Banner
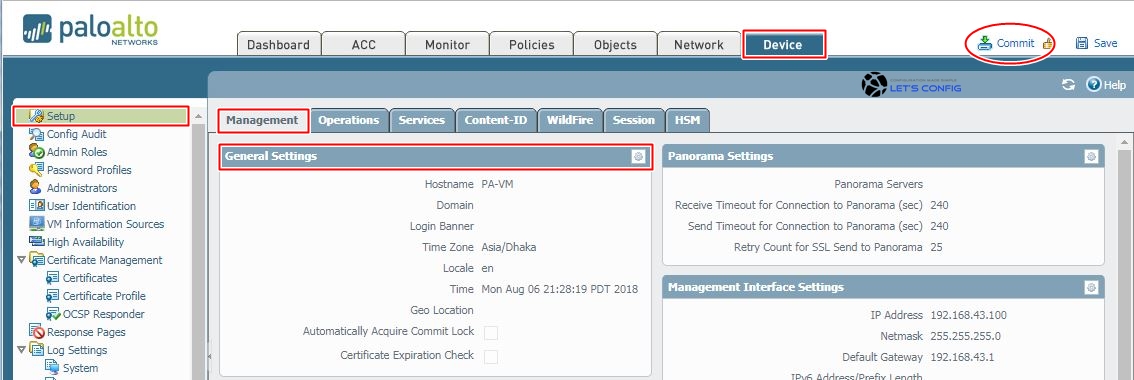
Furthermore, you also can change Hostname, Timezone, and Banner for your Palo Alto Networks Firewall. To do that, you need to go Device >> Setup >> Management >> General Settings. After putting all the information, click commit which is available on upper right corner. Confirm the commit by pressing OK.
If our configuration is OK, then we will see commit confirmation just like bellow.
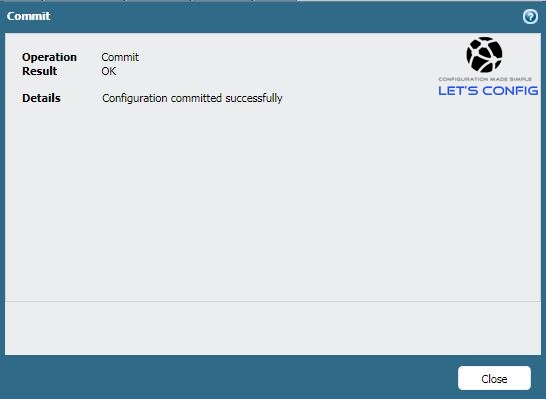
Seems like, we successfully completed management configuration according our plan.
I have a video version of this article. Please have a look –
If you find this article and video useful, share this content. If you have any questions, please feel free to ask.


Hi Rajib,
Does changing the host name of the firewall affect anything? OR is that just an identifier for our eyes, as opposed to seeing the IP address in a web browser tab?
Thanks,
John
It should not affect anything. However, for many services integration, you need certificates on your PA firewall, and that time it could create problems. You might need to to generate new certifications for those services.
So, check all the integration first and then go for the change.
Btw, I forgot to mention I don’t have a router or any device in front of my Palo Alto except the ISP router. It will act as a branch site and be part of a site-to-site VPN. Thanks
You need a separate connectivity for management interface and WAN interface. What you can do, connect ISP link to e1/1 interface and then management interface with you LAN switch. All VPN configuration will be with e1/1.
Hi Rajib,
One quick question. You have set the default gateway of the management interface to 192.168.43.1. Is that a sub-interface that resides on the Palo alto FW or do you have a device in front of the firewall such as a router? I’m trying to setup my management interface and want it to have internet access for updates, services, etc. but since the management interface can’t be assigned to a zone I’m a little confused. Let’s say I’m using the same subnet. Can I simply create a sub-interface of 192.168.43.1 on the Palo Alto and point the default gateway of the management interface at the sub-interface? Wouldn’t it have to be in a security zone to create a sub-interface?
Thank you!
Hi, default gateway will provide internet access on your management link. This interface is out-of-band and it’s only created for management related configuration. You do not need to assign this interface in any zone or sub-interface.
Thanks so very much Sir for your kind help,
I’m so much grateful. Happy New year to you.
Happy new year Dennis 🙂
Hi Rajib,
Thank you so much for the great tutorials.
I have an issue in thr PaloAlto, the LAN computer can only ping the internet 8.8.8.8 but cannot browse web pages.
i think it’s a dns issue or something related to the policies.
can you advice please ?
Yes, check your dns settings and also policies.
Thanks so very much Mr. Rajib, for the great job you’re doing in the IT industry.
bringing out the less privilledge like me out im very much greatfull.
i always read your post and new comment and learn from it. thanks so much
Hi Dennis, it’s feeling really great to know that, my blog are helping others. Thank you.